Botania Mod Guide: Natural Magic, Mana Flowers & Elven Progression
Botania is a natural magic tech mod built around generating and channeling Mana through magical flowers and devices. With no traditional GUIs and entirely in-world interactions, it offers one of the most unique automation experiences in modded Minecraft, progressing from humble Petals to Terrasteel equipment and the fearsome Gaia Guardian.
Overview
Botania is a tech mod disguised as a magic mod. Everything revolves around Mana, a form of natural energy generated by magical flowers and consumed by devices, tools, and equipment. Unlike most tech mods, Botania has no pipes, no wires, and no traditional GUIs. Every interaction happens in-world: you toss items onto altars, point Mana Spreaders at pools, and configure devices by right-clicking with a  Wand of the Forest.
The mod adds over 630 items and blocks, including 50+ magical flower varieties, three tiers of equipment (Manasteel, Elementium, and Terrasteel), a brewing system, baubles and accessories, six powerful Relics, and a challenging boss fight. Progression flows naturally from gathering Mystical Petals to opening the Alfheim Portal and challenging the Gaia Guardian. You can browse all items and recipes using the tabs at the top of this page.
Botania is fully playable as a standalone mod, and its design philosophy emphasizes creative sandbox gameplay over grinding. Systems are meant to be thought out and designed rather than assembled from blueprints. The mod uses only two particle effects for all its visuals, yet manages to be one of the most aesthetically pleasing mods available.
Getting Started with Botania
- 1
Craft the Lexica Botania
Your first step is crafting the
 Lexica Botania, the mod's in-game guidebook. Combine a Book with any Mystical Petal (the tall flowers found throughout the world in 16 colors). The Lexica Botania contains detailed information on every flower, device, and mechanic in the mod. Keep it handy at all times.
 - 2
Gather Mystical Petals
Mystical Flowers spawn naturally in all 16 colors across most biomes. Break them to collect Mystical Petals, which are the primary crafting ingredient for functional and generating flowers. Each flower drops one petal of its color, and you can also craft
 Floral Fertilizer (Bone Meal + any four different Petals) to force-spawn flowers on Grass Blocks.
 - 3
Build a Petal Apothecary
The Petal Apothecary is your first crafting station. Build one from Cobblestone Slabs and Cobblestone (check the Lexica for the exact pattern). Fill it with Water by right-clicking with a Water Bucket, then toss in the required petals for any flower recipe. Finish by throwing in a Wheat Seed to complete the craft. This is how you create every magical flower in the mod.
- 4
Create Your First Generating Flowers
You need Mana to do anything meaningful. Start with Endoflames, which consume any fuel item (Coal, Charcoal, Wood, etc.) dropped on the ground nearby. Place your Endoflames near a
 Mana Spreader pointed at a
  Mana Pool. The
  Hydroangeas is an even simpler option that generates Mana from adjacent Water source blocks, though at a lower rate. Two or three Endoflames with a steady Coal supply will sustain early crafting needs.
 - 5
Set Up a Mana Spreader and Mana Pool
Craft a
Mana Spreader (Living Wood + Gold Ingot + Mystical Petal) and a Mana Pool (Living Rock). Place generating flowers next to the Spreader. Right-click the Spreader with a Wand of the Forest, then right-click the Pool to link them. The Spreader will fire Mana Bursts toward the Pool, filling it. A standard Mana Pool holds 1,000,000 Mana. You can check the fill level by looking at the pool or using a Comparator.
The Wand of the Forest is your universal interaction tool. Craft it from two Mystical Petals and two Living Wood Twigs. Right-click Mana Spreaders to bind them to targets, right-click devices to configure them, and shift-right-click to rotate blocks. You will use this wand constantly throughout your Botania playthrough.
The Mana System
Mana is the lifeblood of Botania. It is generated by special flowers, stored in Mana Pools, and transferred by Mana Spreaders firing Mana Bursts. The system works without any GUIs: you observe Mana levels visually through the pool's fill animation or read a Comparator signal (1-15 based on fill percentage).
Mana Storage
A standard Mana Pool holds 1,000,000 Mana. A  Diluted Mana Pool (made with Living Rock Slabs) only holds 10,000 Mana and is useful for early game when you want precise infusions. The Creative Mana Pool has infinite capacity and is only available in Creative Mode. You can also store Mana portably using Mana Tablets, which hold up to 500,000 Mana and can be kept in your inventory to fuel Mana-consuming equipment.
Mana Transfer
Mana Spreaders fire bursts of Mana to their bound target. The basic Spreader works for early setups, but as your system grows you'll want to upgrade. The Redstone Mana Spreader has better throughput, the  Elven Mana Spreader (obtained through the Alfheim Portal) is faster still, and the
  Gaia Mana Spreader represents the ultimate transfer speed. You can also attach Lenses to Spreaders to modify their bursts: the Speed Lens increases projectile speed, the Potency Lens increases Mana per burst, and the Efficiency Lens reduces Mana loss during transfer.
For long-distance or pool-to-pool transfer, Sparks are essential. Place a  Spark on top of a Mana Pool and it will automatically share Mana with other Spark-equipped pools within range. Spark Augments allow directional transfer: Dominant forces Mana in, Recessive pulls Mana out, Dispersive sends Mana to nearby players, and Isolated prevents any sharing.
Generating Flowers
Generating flowers are your Mana producers. Each flower type consumes a different resource to create Mana, and they range from simple passive generators to complex machines that reward clever design. All generating flowers are created at the Petal Apothecary.
Early Game Generators
The Hydroangeas is the simplest generator, passively absorbing adjacent Water source blocks to produce a small amount of Mana (generating at a rate of 1 Mana every 3 ticks, or every 2 ticks in rain). It holds up to 150 Mana before needing to release a burst. While weak, it requires zero ongoing resource input.
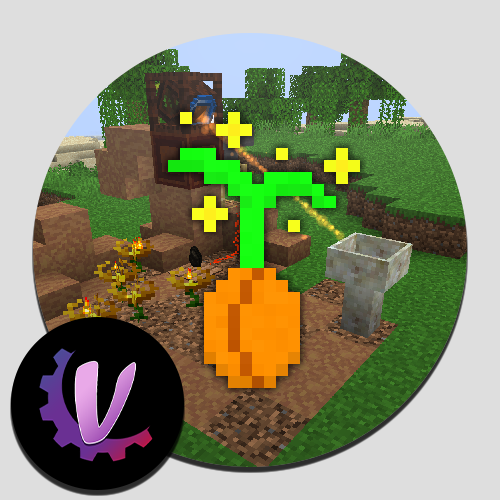
The  Endoflame is the workhorse of early Botania. It picks up fuel items (Coal, Charcoal, Wood, Blaze Rods) dropped within a 3-block radius and burns them for half their furnace burn time, generating 3 Mana per tick. It can hold up to 300 Mana. A simple Dropper or Open Crate feeding Coal to a ring of Endoflames is the classic starter setup.
Mid Game Generators
The  Thermalily consumes Lava source blocks for massive output: 20 Mana per tick for 900 ticks (18,000 total per Lava block). However, it enters a 6,000-tick cooldown (5 minutes) after each activation, making it bursty rather than steady. Pair it with a system that only delivers Lava when the cooldown expires.
The  Munchdew devours Leaf blocks within an 8-block horizontal and 16-block vertical range, producing 160 Mana per leaf. It enters an 80-second cooldown after consuming 5 leaves. Combined with tree farms, this provides steady mid-game Mana.
The  Gourmaryllis consumes food items dropped nearby. Its output scales with the food's saturation value, calculated as min(12, saturation) x saturation x 70 Mana. Feeding it a variety of different foods triggers a streak multiplier (up to 1.8x at 7 unique foods), rewarding diverse diets over spamming a single item.
Advanced Generators
The  Entropinnyum feeds on TNT explosions, instantly filling its 6,500 Mana capacity when a TNT entity detonates within 12 blocks. It only triggers when completely empty, so you need a system that detonates TNT on demand. Building a TNT dispensing and detonation system is a rite of passage for Botania players.
The  Spectrolus demands Wool blocks in a specific color sequence cycling from White through Black. Feed it the correct color and it produces 1,200 Mana per block (or 5,000 for an adult Sheep of the right color). Feeding it the wrong color wastes the item. Automating this requires a color-sequenced Wool delivery system.
The  Dandelifeon is the most complex generator, running Conway's Game of Life on a 25x25 grid when given a Redstone signal. Cells that survive many generations produce exponentially more Mana (up to min(100, generation) x 60 per dying cell), with a maximum capacity of 50,000 Mana. Designing optimal Game of Life patterns is the ultimate Botania puzzle.
The  Rafflowsia consumes other Botania flowers within a 5-block range, producing Mana that escalates dramatically with streak length (from 300 to 98,400 Mana per flower across 38 tiers). Feeding it a variety of different flower types maximizes output. With a capacity of 100,000 Mana, it is one of the highest-output flowers in the mod.
Functional Flowers
Functional flowers consume Mana to perform useful tasks. They pull Mana from nearby Mana Pools (or Spreaders pointed at them) and apply their effects continuously. Here are the most important ones to know about.
Utility Flowers
The  Hopperhock collects items from the ground within a 6-block radius (10 with Mana available) and deposits them into adjacent inventories. It costs just 1 Mana per item inserted and can be filtered using Item Frames placed nearby. This is your primary item collection flower and replaces Hoppers in most Botania designs.
The  Rannuncarpus places blocks from adjacent inventories onto valid surfaces within a 6-block radius (8 with Mana). It costs 1 Mana per placement and is essential for automated farming, building, and flower placement systems.
The  Orechid transforms Stone blocks within a 5-block horizontal and 3-block vertical range into random ores based on weighted distributions. It costs 17,500 Mana per conversion (only 700 in Garden of Glass skyblock mode). This is one of Botania's most popular flowers for renewable ore generation.
Combat and Healing Flowers
The Bellethorn deals 4 HP of damage (20 HP to Witches specifically) to hostile mobs within 6 blocks, costing 24 Mana per target. It checks for targets every 5 ticks, making it a reliable perimeter defense. The  Fallen Kanade applies Regeneration III to nearby players within 2 blocks for 120 Mana per application, providing powerful passive healing near your base.
The  Loonium is an endgame flower that spawns enhanced monsters (2x health, 1.5x damage, with Wither and Regeneration effects) carrying dungeon loot within 5 blocks. At 35,000 Mana per spawn, it is extremely expensive but provides a renewable source of dungeon-quality equipment and rare drops.
Automation Flowers
The  Exoflame keeps nearby Furnaces burning without fuel, essentially providing free smelting as long as Mana is available. The Agricarnation accelerates crop growth in its area, functioning as an automatic Bone Meal applicator. The Clayconia converts Sand into Clay within range, and the
  Pure Daisy transforms adjacent Wood and Stone into Living Wood and Living Rock, which are the fundamental crafting materials for nearly everything in Botania.
The Pure Daisy is one of the first flowers you should create. It converts adjacent Wood logs into Living Wood and Stone into Living Rock, both of which are needed for nearly every recipe in the mod. Place it between alternating Wood and Stone blocks and let it work. Unlike other functional flowers, the Pure Daisy requires no Mana to operate.
Crafting Stations and Progression
Botania's progression is defined by its crafting stations. Each one unlocks a new tier of items and capabilities, and they must be built in roughly this order.
Petal Apothecary
The Petal Apothecary is your entry point. Fill it with Water, toss in the required colored Petals for your desired flower, and complete the recipe by throwing in a Wheat Seed. Every flower in the mod is crafted here. Nine different decorative Apothecary variants exist (Forest, Plains, Mountain, Fungal, Swamp, Desert, Taiga, Mesa, and Mossy), all functionally identical.
Mana Infusion (Mana Pool)
The Mana Pool doubles as a crafting station. Drop items into a filled Mana Pool to perform Mana Infusion recipes. This is how you create Manasteel (Iron Ingot + Mana), Mana Diamonds (Diamond + Mana), and Mana Pearls (Ender Pearl + Mana). Some recipes require a catalyst block placed adjacent to the pool: the Alchemy Catalyst enables transmutation recipes, and the Conjuration Catalyst enables duplication recipes.
Runic Altar
The Runic Altar creates Runes, which are key ingredients in advanced recipes. Place the required items on the altar and supply Mana through a Mana Spreader. The altar shows a Mana progress bar above it. When fully charged, right-click with a Wand of the Forest to complete the craft. Botania includes 16 Runes: four elemental (Water, Fire, Earth, Air), four seasonal (Spring, Summer, Autumn, Winter), one Mana Rune, and seven sin Runes (Lust, Gluttony, Greed, Sloth, Wrath, Envy, Pride).
Botanical Brewery
The Botanical Brewery creates potions using Mana instead of a Brewing Stand. Place a container (Vial, Flask,  Incense Stick, or Blood Pendant) and the required ingredients, then supply Mana. Vials hold 4 doses, Flasks hold 6. Incense Sticks burn in an
  Incense Plate to apply area-of-effect buffs, and Blood Pendants provide passive effects while worn. Over 20 brew types are available, from standard buffs like Speed and Strength to unique effects like Soul Cross and Bloodthirst.
Terrestrial Agglomeration Plate
The Terra Plate is how you create Terrasteel, the mod's most powerful material. Place a  Manasteel Ingot, a
  Mana Pearl, and a
  Mana Diamond on the plate, then channel 500,000 Mana into it from surrounding Mana Pools. The plate requires a specific multiblock structure underneath it. Terrasteel creation is a significant resource investment and marks the transition to endgame content.
Alfheim Portal
The Alfheim Portal opens a trade gateway to the Elven realm. Build the portal frame from Living Wood, place Glimmering Living Wood in the corners, and activate it with a Wand of the Forest while Mana Pools are connected. Toss items through the portal to trade with the Elves. This is how you obtain Elementium Ingots,  Dragonstone,
  Pixie Dust, and the Elven knowledge upgrade for your Lexica Botania. The portal consumes Mana continuously while active.
Terrasteel Creation Pipeline
Equipment and Materials
Botania adds three main material tiers for tools and armor, plus a lightweight cloth set. All Botania equipment can consume Mana from items in your inventory (like a  Mana Tablet) to prevent durability loss, making them effectively unbreakable as long as you have Mana.
Manasteel
Manasteel is your first upgrade. Created by tossing an Iron Ingot into a Mana Pool, Manasteel tools have 300 durability, 6.2 mining speed, harvest level 3 (same as Diamond), and 20 enchantability. Manasteel armor provides 15 total armor points (2/5/6/2 for Helmet/Chestplate/Leggings/Boots) with a durability multiplier of 16. All Manasteel equipment consumes Mana to prevent durability loss: 60 Mana per hit for the Sword and 70 Mana per damage point for armor.
Elementium
Elementium is obtained by trading Manasteel through the Alfheim Portal. Elementium tools share the same 6.2 mining speed and harvest level 3 as Manasteel, but with 720 durability (more than double) and 20 enchantability. Elementium armor provides the same 15 armor points as Manasteel but with a higher durability multiplier of 18. The real advantage of Elementium is its special properties: Elementium tools have a chance to spawn Pixies when you take damage, and  Elementium Shears can harvest special blocks.
Terrasteel
Terrasteel is the pinnacle. Created on the Terra Plate with 500,000 Mana, Terrasteel tools boast 2,300 durability, 9.0 mining speed, harvest level 4 (above Diamond), and 26 enchantability. Terrasteel armor provides 20 total armor points (3/6/8/3) with 3.0 toughness and a durability multiplier of 34. The  Terrasteel Helmet can also accept Ancient Wills (Ahrim, Dharok, Guthan, Torag, Verac, and Karil) for additional combat abilities.
Manaweave Cloth
Manaweave armor is a lightweight set with only 6 total armor points (1/2/2/1) and a durability multiplier of 5. Its strength lies in its high 18 enchantability and its synergy with Mana. Manaweave is primarily used as a crafting material rather than combat armor.
Material Tier Comparison
| Manasteel | Elementium | Terrasteel | |
|---|---|---|---|
| Tool Durability | 300 | 720 | 2,300 |
| Mining Speed | 6.2 | 6.2 | 9.0 |
| Harvest Level | 3 | 3 | 4 |
| Attack Damage Bonus | +2.0 | +2.0 | +3.0 |
| Enchantability | 20 | 20 | 26 |
| Armor Points | 15 (2/5/6/2) | 15 (2/5/6/2) | 20 (3/6/8/3) |
| Armor Toughness | 0.0 | 0.0 | 3.0 |
| Armor Durability Mult. | 16x | 18x | 34x |
All Botania tools and armor can pull Mana from a Mana Tablet in your inventory to prevent durability loss. Keep a fully charged Mana Tablet on you at all times and your equipment will effectively last forever. Manasteel tools consume 60 Mana per use and armor consumes 70 Mana per damage absorbed.
Special Tools and Weapons
Terra Shatterer (Terra Pick)
The  Terra Shatterer is Botania's signature mining tool. It starts as a standard Terrasteel Pickaxe but gains power by absorbing Mana. It has six rank levels based on stored Mana: Rank D (0 Mana, 1x1 mining), Rank C (10,000+ Mana), Rank B (1,000,000+ Mana), Rank A (10,000,000+ Mana), Rank S (100,000,000+ Mana), and Rank SS (1,000,000,000+ Mana). Each rank increases the mining area, breaking progressively larger squares of blocks with each swing. When equipped alongside a Thor Ring (a Relic), the mining radius expands further and mines in all directions rather than just the face you hit.
Mana Blaster
The  Mana Blaster fires Mana Bursts as projectiles, consuming 120 Mana per shot with a 30-tick cooldown (reduced by 8 ticks per level of Haste). You can install a Lens into the blaster to modify its shots, and the Clip attachment lets you store up to 6 different Lenses, switching between them with a right-click. The mod includes 21 different Lens types: Speed, Power, Time, Efficiency, Bounce, Gravity, Mine, Damage, Phantom, Magnet, Explosive, Influence, Weight, Paint, Fire, Piston, Light, Warp, Redirect, Firework, and Storm.
Rods
Botania includes a variety of Rods that consume Mana for powerful utility effects. The  Rod of the Lands creates Dirt, the
  Rod of the Seas creates Water sources, the
  Rod of the Hells creates fire, and the
  Rod of the Shifting Crust allows mass block replacement. The
  Rod of the Skies launches you into the air, while the
  Rod of the Plentiful Mantle creates Cobblestone. These tools fill niche roles that become indispensable once you start using them.
Baubles and Accessories
Botania adds an extensive collection of wearable baubles (requiring the Curios mod). These accessories provide passive bonuses while equipped and are a major part of your power progression.
Mana Accessories
The  Band of Mana stores Mana on your person, while the
  Greater Band of Mana holds significantly more. The Band of Aura passively generates Mana over time (the Greater version generating faster). These are essential for keeping your tools powered while exploring away from your base.
Movement Accessories
The  Soujourner's Sash increases movement and jump height, while the
  Globetrotter's Sash is a direct upgrade with even greater speed. The Flugel Tiara grants creative-mode-style flight at the cost of Mana, with multiple wing variants for cosmetic customization. The Cirrus Amulet and
  Nimbus Amulet provide double and triple jump abilities respectively.
Combat Accessories
The Pixie Ring has a chance to spawn a Pixie when you take damage. The Cloak of Balance reduces damage taken, the  Cloak of Sin reflects damage back at attackers, and the
  Cloak of Virtue absorbs a portion of incoming damage as Mana. The
  Charm of the Diva charms hostile mobs on hit. The Magnet Ring attracts items toward you, and the
  Ring of Far Reach extends your block interaction range.
The Gaia Guardian Boss
The Gaia Guardian is Botania's ultimate challenge. This boss has 320 HP (160 hearts) and must be summoned by using a  Gaia Spirit Ingot on a Beacon surrounded by the correct multiblock pattern (detailed in the Lexica Botania). The fight takes place in a restricted 12-block arena, and you cannot leave the area without failing the encounter.
The boss fights in waves, spawning hostile mobs between its own attacks. It takes 8 seconds to fully materialize after summoning, during which it is invulnerable. The Guardian spawns 10 waves of minions at regular intervals throughout the fight and uses teleportation, landmines, and Pixie attacks. If multiple players are present, the boss scales its difficulty accordingly.
Defeating the Gaia Guardian drops Gaia Spirits, which are used to craft the most powerful items in the mod including the Gaia Mana Spreader and the Gaia Pylon. The boss can also be fought in hard mode for enhanced rewards. Completing the fight earns access to the  Dice of Fate, a one-time-use item that randomly awards one of six Relics you haven't yet obtained.
The Gaia Guardian detects whether you're wearing armor. Come prepared with at least Terrasteel armor, several Mana Tablets, and strong weapons. The arena is only 12 blocks in radius, so mobility baubles like the Soujourner's Sash are critical. Bring splash potions of Healing and make sure your Beacon is active. Do NOT attempt this fight in early game gear.
Relics
Relics are unique, powerful items obtained from the Dice of Fate after defeating the Gaia Guardian. Each Relic is bound to the first player who picks it up and cannot be used by anyone else. There are six Relics in total, and the Dice will only award ones you haven't yet collected.
The  Ring of Odin grants +20 maximum health (10 extra hearts) and immunity to drowning, fall damage, suffocation, and fire damage. This is widely considered the most universally useful Relic. The
  Ring of Thor enhances the Terra Shatterer by adding +1 to its mining radius and enabling mining in all directions rather than just the struck face.
The  Ring of Loki allows multi-placement: bind positions relative to a central block, then place blocks at all bound positions simultaneously for a Mana cost that scales exponentially with the number of cursors. The Eye of the Flugel provides cross-map teleportation within the same dimension, costing 10 Mana per block of distance traveled.
The  Key of the King's Law summons up to 20 floating golden weapons (costing 150 Mana each) that fire at enemies in the area. The Fruit of Grisaia (Infinite Fruit) provides unlimited food at the cost of 500 Mana per hunger point, eliminating food management entirely. As a hidden Easter egg, naming it "Das Boot" turns it into a drink instead of food.
The Brew System
The Botanical Brewery offers over 20 brew types, each with a specific Mana cost. Standard brews include Speed II, Strength II, Haste II, and Resistance II (all costing 4,000 Mana), Regeneration II (7,000 Mana), and Invisibility (8,000 Mana). Healing brews cost 6,000 Mana and provide Instant Health II, while Absorption IV costs 7,000 Mana.
The truly powerful brews are the unique Botania effects. Feather Feet (7,000 Mana) prevents fall damage, Soul Cross (10,000 Mana) heals you when you kill mobs, and Bloodthirst (20,000 Mana) enhances combat. The Overload brew (12,000 Mana) stacks Strength IV, Speed III, and Resistance II simultaneously but also inflicts Nausea III. The Emptiness brew is the most expensive at 30,000 Mana. For clearing negative effects, the Clear brew costs only 4,000 Mana.
Brews can be stored in Vials (4 doses), Flasks (6 doses), infused into Blood Pendants (worn for passive effects), or applied to Incense Sticks (burned in an Incense Plate for area-of-effect buffs). Not all brews are compatible with all containers; check the Lexica Botania for specific compatibility.
Key Brew Costs
| Speed II / Strength II / Haste II | 4,000 Mana |
| Instant Healing II | 6,000 Mana |
| Regeneration II | 7,000 Mana |
| Absorption IV | 7,000 Mana |
| Invisibility | 8,000 Mana |
| Soul Cross | 10,000 Mana |
| Overload (Str IV + Spd III + Res II) | 12,000 Mana |
| Bloodthirst | 20,000 Mana |
| Emptiness | 30,000 Mana |
Corporea System
The Corporea system is Botania's answer to item logistics networks, using Corporea Sparks placed on inventories to create a wireless item network. Place a Corporea Spark on any chest, barrel, or inventory, and it joins the network automatically. The Corporea Index lets you request items by typing their name in chat within range, and the system will pull matching items from connected inventories. Corporea Funnels automatically extract items based on Redstone signals, and Corporea Interceptors detect when items pass through the network.
This system allows for sophisticated automated storage and retrieval without any pipes or cables. Combined with Hopperhocks for item collection and Open Crates for item dispensing, you can build fully automated crafting and production lines using nothing but flowers, Sparks, and in-world mechanics.
Decorative Blocks and Building
Botania adds a generous selection of decorative blocks for builders. Living Rock comes in brick, chiseled, cracked, and mossy variants. Living Wood and  Dreamwood both have planks, mossy, framed, pattern framed, and glimmering variants. There are 16 colors of Mystical Flower blocks that can be placed decoratively, plus 16 Shiny Flower variants that emit light. Metamorphic Stone variants (Forest, Plains, Mountain, Fungal, Swamp, Desert, Taiga, Mesa) are created by the
  Marimorphosis functional flower and provide biome-themed building materials.
Three platform types offer unique building mechanics: Abstruse Platforms are invisible to players but solid, Spectral Platforms are visible but can be walked through, and Infrangible Platforms are indestructible. The Mana Flame provides an ethereal green light source, and the  Tiny Potato is a beloved decorative block that responds to being named and right-clicked.
Progression Summary
Botania's progression flows naturally through several distinct phases. Understanding this progression helps you plan your resource gathering and infrastructure.
Botania Progression Path
Frequently Asked Questions
How do I get Living Wood and Living Rock?
Craft a Pure Daisy at the Petal Apothecary and place it near Wood logs and Stone blocks. The Pure Daisy will slowly convert adjacent Wood into Living Wood and Stone into Living Rock. This is a passive process that requires no Mana. Place the Pure Daisy surrounded by alternating logs and Stone for maximum efficiency.
Why isn't my Mana Spreader firing?
Make sure the Spreader is bound to a valid target. Right-click the Spreader with a Wand of the Forest, then right-click the target (usually a Mana Pool). The Spreader also needs a source of Mana: place generating flowers adjacent to it, or point another Spreader at it. If the target pool is full, the Spreader will stop firing to avoid wasting Mana.
Does Botania work with other tech mods?
Yes. Botania is designed to be fully playable standalone but integrates well with other mods. It has built-in Thaumcraft compatibility (when loaded), and the RF  Mana Fluxfield block can convert Mana to Forge Energy (RF/FE) for use with tech mods. Botania's item transport can complement pipes and cables from other mods.
How do I open the Alfheim Portal?
Build a portal frame from Living Wood with Glimmering Living Wood in the corners (the exact pattern is in the Lexica Botania). Connect Mana Pools with Sparks or Spreaders to power the portal. Right-click the portal structure with a Wand of the Forest to activate it. The portal consumes Mana continuously while open. Toss items through to trade with the Elves; they'll return Elementium, Dragonstone, and other elven materials.
What's the best way to generate Mana in the late game?
The Entropinnyum (TNT-powered, 6,500 Mana per detonation) and Rafflowsia (consuming other flowers, up to 98,400 Mana per flower at max streak) are the strongest generators. The  Kekimurus (Cake-powered) and Dandelifeon (Game of Life simulation, up to 50,000 capacity) are also excellent. For steady, low-maintenance generation, multiple Gourmaryllis flowers fed diverse foods provide reliable throughput.
Can I move or pick up placed flowers?
Yes. You can break placed flowers with any tool or by hand and they'll drop as items. Floating Flower variants hover in the air and don't need a block underneath them, which is useful for placing flowers above Mana Pools or in mid-air setups.